.png?height=120&name=Plantiga%20lockup%20black%20(1).png)
The Base Station allows you to easily charge and sync your pods and upload data without using a computer.
Setting up your Hardware
Note: Setting up the Base Station requires an iPhone or Android phone with Bluetooth enabled in the settings.

1️⃣ Download the Plantiga Setup application on the Apple (iOS) App Store or Google Play (Android) Store. Once installed, you’re ready to start getting the Base Station configured.
2️⃣ In your package from Plantiga, you should have four pieces of Base Station hardware: the Plantiga Base Station, a Dock, a USB A to C cable, and a microUSB AC Power Adapter. Connect the Dock to the Base Station with the USB cable, making sure each connection point is secure. Then, plug in the microUSB power adapter into the Base Station and then plug it in to an AC power outlet.
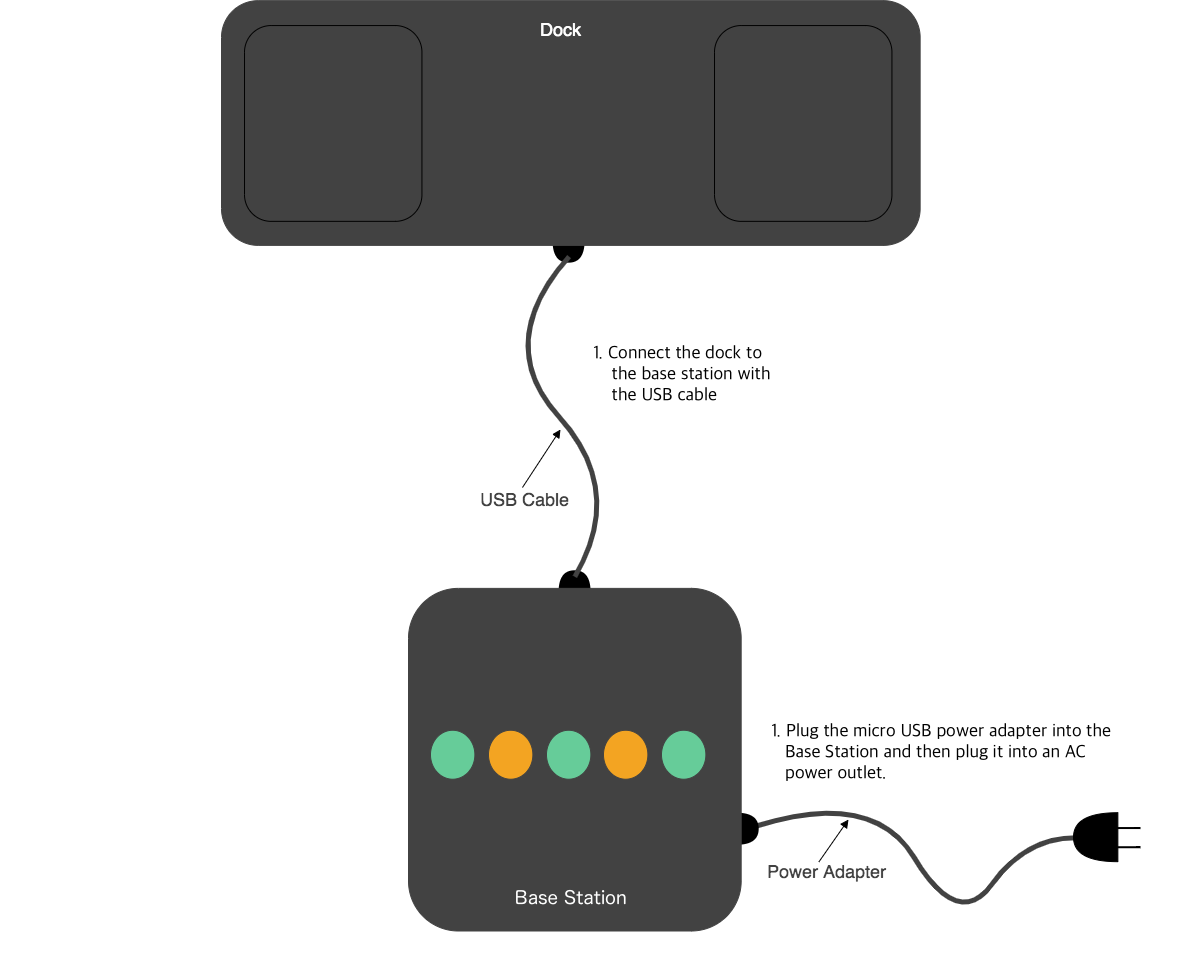
Note: Make sure you always use the power adapter provided, as it ensures the Base Station will receive enough power to charge your insoles and safely power the Base Station at the same time.
3️⃣ After plugging in the power adapter, the lights on your Base Station should light up after about 10-15 seconds when it is finished booting. The lights should alternate in a pattern between green and orange, indicating that the adapter is ready for set up. If the lights do not show up after more than two minutes, try unplugging your Base Station and replugging it in. If the lights alternate between black and red, make sure the Dock is properly connected to the Base Station’s USB port.
Using the Plantiga Setup App
The Plantiga Setup App is the mobile phone application used to configure a nearby Base Station, available on both iOS and Android.
1️⃣ When opening the app, you will be prompted to follow the steps already outlined above: Connect the USB cable to your Dock and to plug in the power adapter to the Cloud Connector. Once you have ensured the Base Station is powered on, press the green "Next" button and follow the next steps.
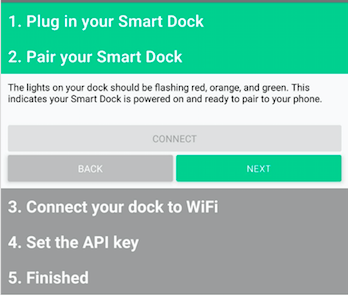
2️⃣ Press the green "Connect" button to establish a bluetooth connection to your Base Station. Your phone operating system may prompt you that Plantiga Setup is requesting access to bluetooth, which you can allow.
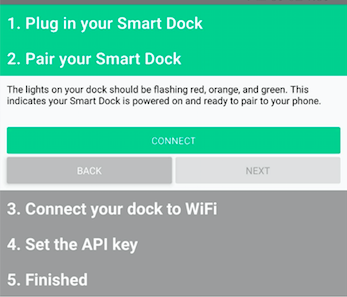
3️⃣ After establishing a connection, the "Next" button will turn green and you can proceed to the next step.
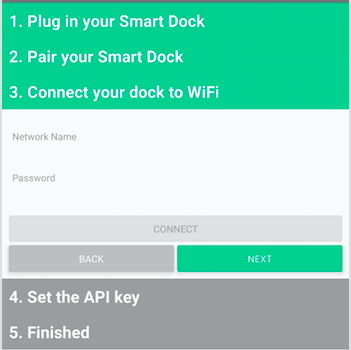
4️⃣ Next, the app will ask for your wifi information. You should type in your wireless network name and password exactly as you would on any other device when connecting to wifi. Press the "Connect" button and wait for the "Next" button to turn green, indicating the Base Station has connected to the internet. This step may take up to one minute to complete.
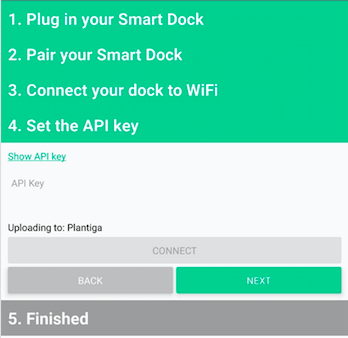
5️⃣ The final step is to connect the Base Station to the team you wish to upload data to. You can either manually enter the API Key from your Plantiga.io account, or you click "Show API Key'' to open your phone's browser to the Plantiga.io settings tab where you can copy and paste the team's API Key using the clipboard button. You can then switch back to the Plantiga Setup App and copy this key into the text box.
-png.png?width=600&name=downloads-intercomcdn-comio1661168258479292e3eebbe82c8df88e8Screen+Shot+2019-11-26+at+11-23-04+AM-png%20(1)-png.png)
6️⃣ Press the green "Connect" button and wait for the "Next" button to turn green. The app should also update to show the name of the team your Base Station will be uploading to.
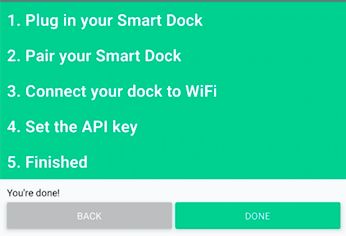
7️⃣ Your Base Station is now configured and ready to use! We recommend keeping the Base Station plugged in and keeping the pods docked whenever they're not in use to make sure they're always charged and ready to go.
Tip: If you ever need to change your wifi information, you can use the Plantiga Setup App to add a new wifi network whenever you wish. The Base Station will remember several wifi networks, so once you have added a network, there will be no need to re-enter an old wifi network when moving locations again.