.png?height=120&name=Plantiga%20lockup%20black%20(1).png)
The Cloud Connector transfers data from your pods to the Plantiga cloud for analysis - here's how to get it running on your computer.
Download the Cloud Connector for OSX (Mac) or Windows from the link on the plantiga.io Settings page for each laptop or desktop you want to use. Please ensure the computer being used meets system requirements.
Once the download has finished, follow the on-screen instructions to open the Cloud Connector.
For Mac Users
Note: MacBooks with the new Apple M1 chip are incompatible with the cloud connector.
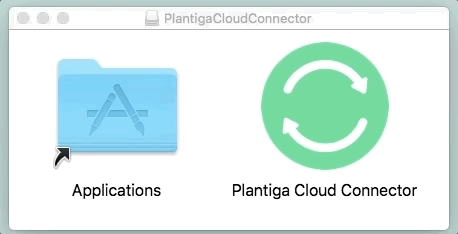
For Macs, you'll need to drag the Plantiga Cloud Connector app to your Applications folder. If you see a popup asking if you want to replace an existing item with the one you're moving, click on Replace.
Once the app is done copying, go to your Applications folder and double click on the Plantiga Cloud Connector.

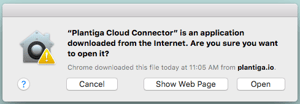
When you see a popup asking if you're sure you want to open the application, click Open.
If the Cloud Connector doesn't open right away, double click on it again in your applications folder.
Next you'll need to enter your API key (see below).
__________________________________________________________________
Windows Users
Once you have downloaded the Plantiga Cloud Connector Installer, double click it to start the installation process.
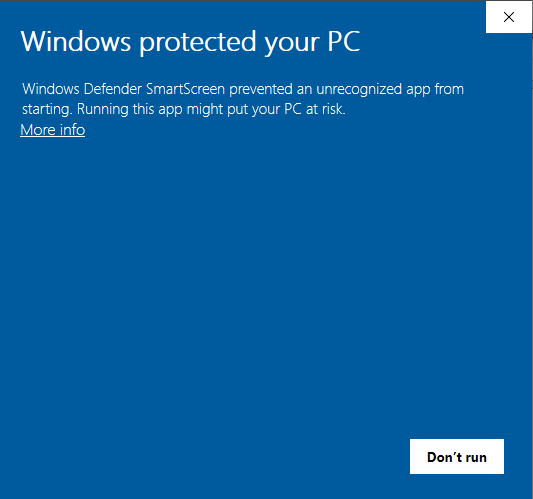
If you are running Windows Defender, you may be prompted to allow the installer to run. Click "More Info", then the "Run anyway" button.

If you are running an antivirus programme on your computer, you may see an error like this:
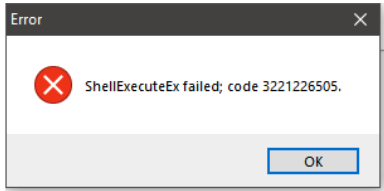
Clicking OK or pausing your antivirus while you're installing the Cloud connector should allow the installation to proceed.
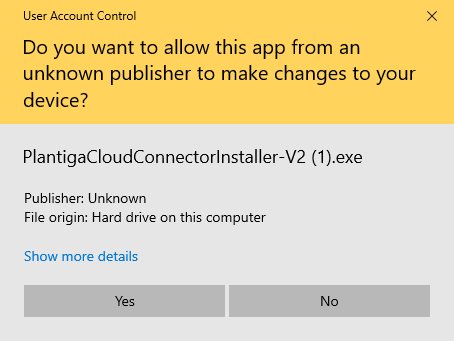
If you are prompted for User Account Control to install the application, click the "Yes" button.
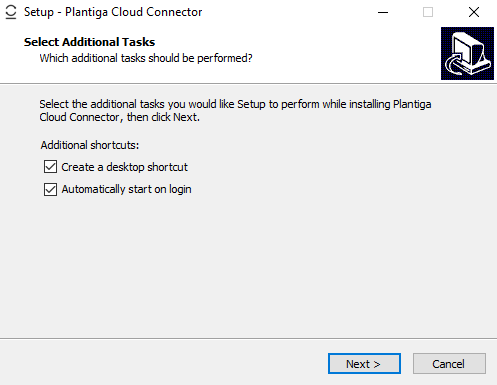
If you want to have a desktop shortcut, or start the Plantiga Cloud Connector on login (recommended), make sure those boxes are checked.
Then click the "Next >" button.
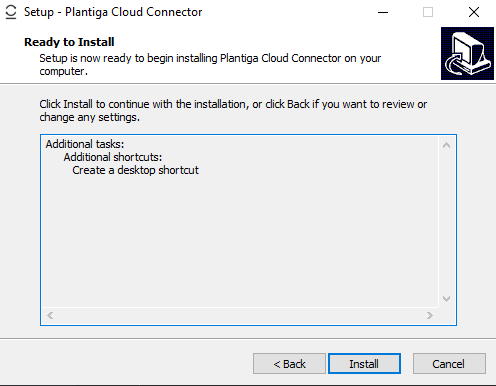
Click the "Install" button.
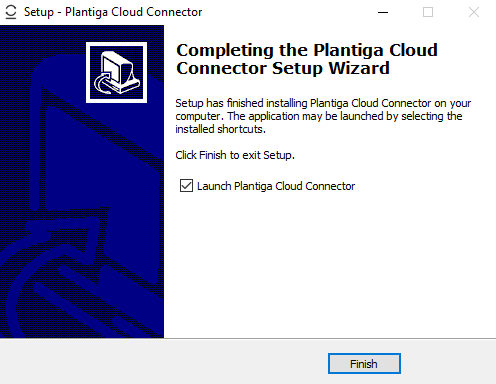
The installation is now complete. If you want to launch the Plantiga Cloud Connector, make sure the box is ticked.
Then click the "Finish" button.
If you chose not to launch the Plantiga Cloud Connector from the installer you can run it by running it from your start menu, desktop (if you chose to create a desktop shortcut) or by restarting your computer (if you chose to run the Plantiga Cloud Connector on startup).
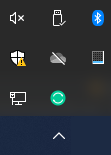
When the Cloud Connector is running, the icon will appear on the bottom taskbar, usually with the additional programmes revealed by clicking the up arrow.
__________________________________________
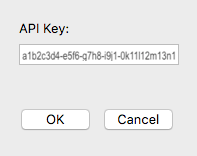
Enter your API Key
TIP: You may need administrator privileges to give the app network access - contact your system administrator if necessary.
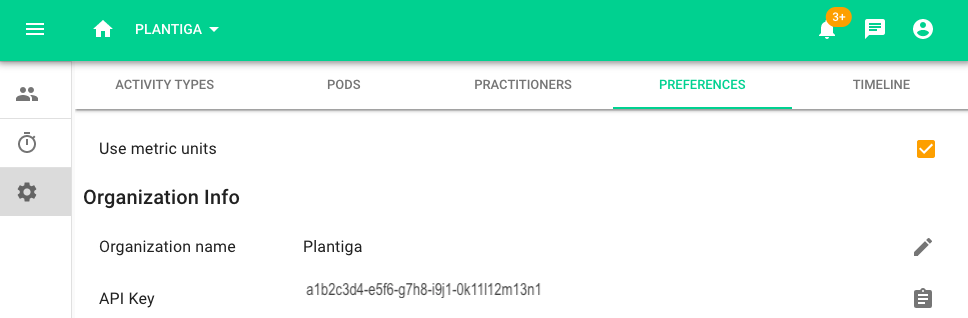
To connect the Cloud Connector to your organization, you need to enter your API key. Click on Setting in the plantiga.io menu bar, go to the PREFERENCES tab, and copy the API key, the long string of numbers and letters.
Then click on the Cloud Connector icon in your menu bar and go to Options then Add Team, paste in the API key in the pop-up window and click OK.
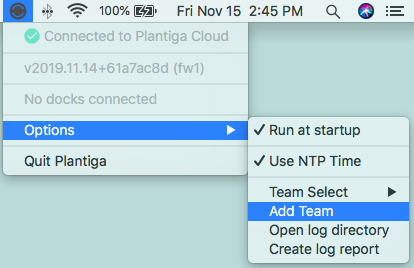
TIP: To make sure your Cloud Connector runs when you restart your computer, click on Options then check Run at startup.