.png?height=120&name=Plantiga%20lockup%20black%20(1).png)
Welcome to Plantiga! Here's all the info you'll need to set up your system for the first time and get ready for onboarding.
This guide is meant for Plantiga Pro users. If you are an individual Member, follow the instructions that came with your Plantiga kit or reach out to your Movement Coach for more info.
When you're finished with this how-to guide, you will have created a new person to assess and paired pods to them. This will make the onboarding process quick and easy, and will get you ready to run your first assessment later.
At the end of this guide, you'll end up with something like this on your plantiga.io home page:

1️⃣ First, set up the Cloud Connector on your computer.
The Cloud Connector transfers data from your pods to the cloud for analysis and also synchronizes your pods.
Download the Cloud Connector for OSX or Windows from the link on the plantiga.io Settings page for each laptop or desktop you want to use. Once the download has
finished, follow the on-screen instructions to open the Cloud Connector.
For more detailed instructions, click here.
To connect the Cloud Connector to your organization, you need to enter your API key. Click on Settings in the plantiga.io menu bar, go to the PREFERENCES tab, and copy the API key.

Then click on the Cloud Connector icon in your menu bar and go to Options then Settings, paste in the API key in the pop-up window and click OK.
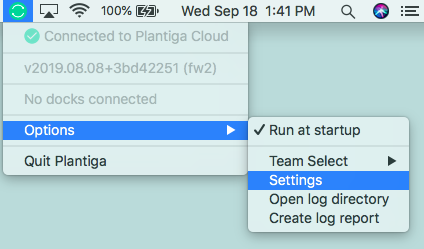
To make sure your Cloud Connector runs when you restart your computer, click on Options then check Run at startup.
2️⃣ Next, set up your pods
These steps will connect your pods to your organization, initialize them, and synchronize them to each other and your computer.
Connect your dock
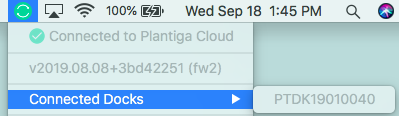
First, connect your dock to a computer running the Cloud Connector using the USB cable provided by Plantiga. To make sure the dock is connected, click on the Cloud Connector icon in your menu bar - you should see the ID of the connected dock (the dock ID is printed on the bottom of the dock).
Dock your pods
Take your pods and place them on the dock so that they click into place. In plantiga.io, you should see the pod IDs show up under Notifications (the pod IDs are printed on the top and bottom of the pods).

If the pod IDs don’t show up, try these troubleshooting tips .
Initialize your pods
To initialize your pods, leave them on the dock until the light turns green - they are now ready to be paired & used for data collection!
3️⃣ Then, set up your first person
Set up a profile for the first person you want to collect data on (you can do a test run on yourself to start).
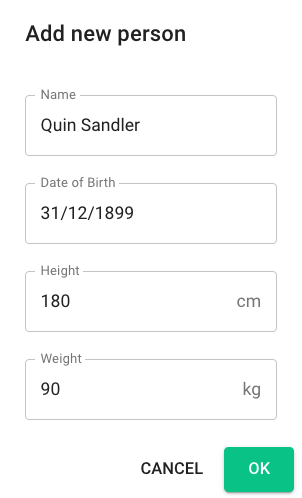
To add a new person to your organization, click on People in the menu bar then click on the Add Person icon.

Enter the person’s name and information, then click OK.
4️⃣ Finally, pair the pods
Pair the pods that you've just set up and are still docked by clicking on Notifications. You'll see a list of Docked Pods - check the boxes next to the pods you want to pair, then click the Pair button at the bottom of the list.
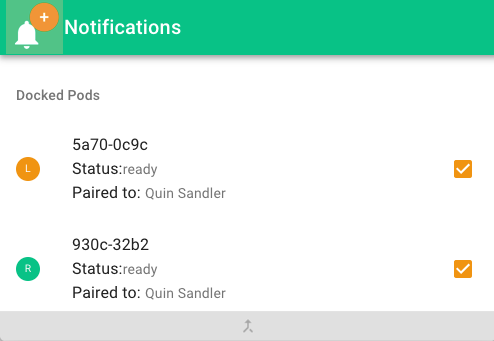
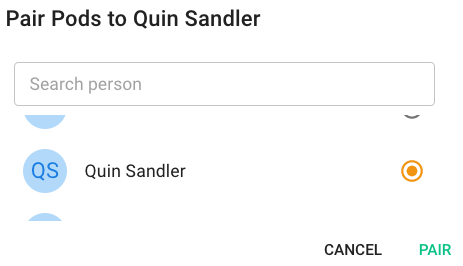
Select the name of the Person you want to pair to from the list, then click PAIR.
✅ Done!
When you go back to the home page, you should see the pods you just paired beside the name of the person you just created.

If what you're seeing doesn't look like the picture above, you may have missed a step. We'll help you out during our Onboarding session.
➡️ Next Steps
We'll walk you through the whole system during your Onboarding session, but if you're eager to get started yourself, you can continue on to this guide on how to Collect Data on your First Activity.